How To Pack and Ship Hatching Eggs: Step by Step Guide for Damage Free Delivery
Learn how to pack and ship hatching eggs with our step-by-step guide. Ensure your eggs arrive intact and viable for incubation by using proper materials and techniques. Discover tips for labeling, wrapping, and shipping to maximize hatching success.
Never wash hatching eggs that you are planning to incubate.
Subscribe
To join our mailing list and never miss an update!
Shipping hatching eggs is a delicate process that requires careful attention to detail to ensure that the eggs arrive safely and remain viable for hatching. The journey from your farm to the recipient's incubator is filled with potential hazards that could compromise the eggs' integrity, but with the right preparation and packing techniques, these risks can be minimized.
This guide will walk you through the essential materials and step-by-step instructions needed to pack and ship hatching eggs securely, helping to maximize their chances of successful incubation upon arrival.
MATERIALS NEEDED:
• Egg cartons (preferably foam or plastic for extra cushioning)
• Bubble wrap
• Packing peanuts or shredded paper
• Strong shipping box (double-walled)
• Packing tape
• Pencil
• NPIP paperwork

STEP-BY-STEP INSTRUCTIONS:
1. Label the Eggs:
With a soft pencil or marker, gently label each egg with the breed and lay date. This helps the recipient identify the eggs upon arrival if they have ordered more than one breed.
Write the date each egg was laid on the large end of the egg with a pencil. Poultry eggs remain fertile for hatching up to 21 days. However, the viability of the embryo begins to decline after 14 days. It’s important to keep this in mind when selecting which eggs you are going to ship and how many days they are expected to be in the mail.
2. Select the Right Eggs:
As a general rule, select eggs that are no more than 7 days old to ship. This way, even if USPS is running a few days late- the shipment will still arrive in plenty of time for the eggs to be incubated. Choose only clean, uncracked, and fresh eggs for shipment.
Do not wash the eggs! Washing removes the protective bloom, which is essential for preserving the egg’s viability. The egg bloom, also known as the cuticle, is a natural protective coating found on the outer surface of an eggshell. This thin, invisible layer is composed of protein and serves several important functions:
• Barrier Against Bacteria: The bloom acts as a protective barrier that helps prevent bacteria and other microorganisms from penetrating the eggshell and contaminating the egg. This is crucial for maintaining the egg's freshness and preventing infections.
• Moisture Retention: The bloom helps retain moisture within the egg, preventing it from drying out. This is especially important for hatching eggs, as proper moisture levels are essential for the development of the embryo.
• Sealing Pores: Eggs have tiny pores in their shells that allow for the exchange of gases like oxygen and carbon dioxide. The bloom partially seals these pores, regulating the exchange and further protecting the egg from external contaminants.

3. Wrap the Eggs:
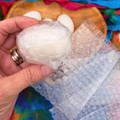
Individually wrap each egg in bubble wrap. The bubble side of the packaging should be touching the egg, (aka “bubbles in”). Ensure that the bubble wrap completely covers the egg, providing a snug fit to prevent movement. Secure the wrap with tape if necessary.
If you are going to be shipping eggs regularly, consider purchasing bubble-wrap packing sleeves online. We use size 6”x4” bubble sleeves that can be purchased on Amazon in bulk.
Once all of your hatching eggs are individually wrapped in protective bubble wrap, place them into a plastic or foam egg carton, making sure to set the eggs vertically and with the large end up.
Foam blocks with 6-12 egg sized holes cut out that are made specifically for shipping hatching eggs can be purchased on eBay. These are amazing at protecting the eggs in transit and this is the method we use when shipping Gypsy Shoals Farm hatching eggs.
Whether you are using egg shipping foam blocks or standard egg cartons, two things are important:
• Always individually bubble wrap each egg before placing it into the carton.
• Always place eggs into the carton with the large end vertical and facing upwards.
4. Pack Hatching Eggs Large END Up:
Hatching eggs are placed large side up during shipping to protect the developing air cell and to promote the proper orientation of the embryo.
The air cell is located at the large end of the egg and plays a crucial role in the development of the embryo. During incubation, the air cell provides the first breath of air to the chick before it hatches. Keeping the large side up helps prevent the air cell from becoming dislodged or moving to an incorrect position, which could affect the chick's ability to hatch.
Furthermore, as the embryo develops, it naturally positions itself with its head toward the air cell at the large end of the egg. This orientation is essential for the chick to pip (break) through the shell during hatching. If the egg is stored or shipped with the pointed end up, the embryo might orient incorrectly, which could lead to difficulties during development and hatching.
Shipping eggs with the large end up also reduces the risk of hatching eggs being cracked or broken during shipment. The large end of the egg is better suited to handle the pressure and movement during shipping.
By ensuring that hatching eggs are shipped with the large side up, the chances of successful incubation and hatching are greatly improved.

5. Prepare the Shipping Box:
Use a double walled shipping box, when possible, for additional protection. If not, consider packing your egg carton inside a box and then packing that box inside another box.
Line the bottom of your shipping box with a layer of bubble wrap, foam or packing peanuts. Place your well-protected egg carton that contains the hatching eggs on top of this cushioning layer. Fill in any gaps around the sides with packing peanuts or packing paper. Finish with a layer of bubble wrap on the top.
It’s important to pack your box so there is no space for the eggs to move around, but also don’t over stuff the box and cause undue pressure on the eggs. This will cause eggs to break if the package is dropped or something heavy is placed on top of it.
Trending Articles
6. Complete NPIP Paperwork Online:
All egg shipments in the U.S. require certain paperwork be included when shipping out of state. While participating in the National Poultry Improvement Program (NPIP) is completely voluntary, it is necessary if you want to legally ship hatching eggs or live chicks out of state. This paperwork verifies that your chicken flock is regularly inspected and certified to meet the quality health, disease-free and bio-security guidelines set out by the Department of Agriculture.
Print a copy of the VS Form 9-3: Report of Sales of Hatching Eggs, Chicks, and Poults. It must be included with your shipment. You may also want to include any specific instructions for how the recipient should document and report any damage to the shipment. Pictures and reports filed with the post office go along way towards recovering any insured losses from the carrier.

7. Seal and Clearly Label the Box:
8. Choose a Reliable Shipper:
9. Notify the Recipient:
Trending Products
Copyright©2024 All rights reserved. We love to have you share our article as long as you include a direct link to this page. This article or any portion thereof , including all images, may not be reproduced or used in any manner whatsoever without the express written permission of Gypsy Shoals Farm.


