


10 Reasons Emu Eggs Fail To Hatch
Learn the essential factors for successfully incubating emu hatching eggs. From temperature and humidity control to proper handling, discover how to improve your hatch rates.
Proper air circulation is critical to the exchange of oxygen and carbon dioxide inside the incubator as the emu hatching egg develops.
Subscribe
To join our mailing list and never miss an update!
Hatching emu eggs can be a delicate and rewarding process, but it requires careful management of several key factors to ensure success. Although emu eggs are more robust than chicken eggs, they still need precise conditions during incubation to promote proper embryo development. Whether you’re dealing with handling issues, temperature fluctuations, or humidity control, small errors can lead to failed hatches.
In this article, we’ll explore the most common mistakes and challenges associated with hatching emu eggs and provide practical tips to help you improve your hatch rates and ensure healthy chicks.

1. Handling Errors/Egg Damage
Although emu eggshells are significantly stronger than chicken eggs, they still require careful handling. Inside each egg is a fragile embryo, and any rough treatment—whether it’s shaking, dropping, or tossing—can jeopardize the egg's viability.
Imagine the embryo inside: when the egg is abruptly jolted, the delicate contents are slammed against the shell. While nature has designed emu eggs to endure the gentle movements made by a father turning the clutch, they are not built to withstand the rough handling that can occur during shipping. If eggs are sent by mail, they should be carefully packaged with plenty of cushioning material to absorb shocks and protect the developing life inside.

2. Temperature Control Errors
The ideal temperature to incubate emu hatching eggs is 97.5F degrees. Maintaining a constant and controlled temperature is critical to development and, along with humidity control, is a huge factor in hatchability but also avoiding a plethora of health and viability issues that can display in newly hatched chicks.
Planning for power outages by having a backup generator will give peace of mind that if the power goes out, you will still be able to save your developing emu chicks.
3. Humidity Control Errors
The ideal humidity to incubate emu hatching eggs is 25-35%. We set our emu eggs at 30% humidity on Gypsy Shoals Farm successfully as a standard procedure. Large fluctuations in humidity put hatchability at high risk of failure and increases the chance that emu chicks will be born with deformities, curled toes and other possible ailments. It’s critical to maintain a consistent humidity level for this reason.
During the hatching phase of emus, day 40 and beyond, the humidity level should be maintained. Unlike chickens, you don't raise the humidity during lockdown. In fact, we do not even use a water tray to introduce humidity to our hatcher at all because it stays at 30% humidity.
Make sure the water tray never evaporates completely during the incubation phase. It is worth noting that humidity is not created by adding more water to the tray. Humidity is created by the surface area of the water that is exposed to air. Therefore, if you want to lower humidity, cover a portion of your water tray with saran wrap. If you want to raise the humidity level in your incubator, adding a sponge to the water tray will increase surface area and result in increased humidity.
Learn more about the critical role humidity plays in emu embryo development in our article 'Ideal Humidity for Incubating Emu Eggs'.
4. Loading/Setting Errors
Always allow hatching eggs to rest for a minimum of 12 hours if you have received them in the mail. This gives the egg an opportunity to gently realign its’ contents the way nature intended after a jostling journey.
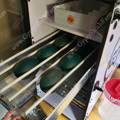
Allow a minimum of one inch spacing around each egg when setting them in the incubator. This allows for proper air circulation and exchange of carbon dioxide.
Inspect each egg for tiny cracks or damage that penetrates the shell before loading and always handle gently during this process and whenever rotating the eggs later.
5. Rotating Errors
It is critical to rotate the emu eggs 3-4 times a day during the incubation process. Each rotation should be one-half turn and should not be rotated the same direction every time. A good way to keep track of rotation is to mark the eggs, using a white crayon, with an arrow pointing in one direction.
When eggs are not turned for extended periods of time during the incubation stage, the embryo may stick to the membrane lining the inside of the egg shell or the yolk sac may stick to the bottom of the egg. Both of these conditions prevent proper embryo development from occurring.
Emu hatching eggs do not get rotated after day 40 of development. Do not rotate the eggs once you have moved them into the hatcher. If you are using a tabletop poultry incubator, be sure to turn off automatic rotation 10 days before the expected hatch date.
6. Carbon Dioxide Build Up
As the emu chick develops, there is an exchange of oxygen and carbon dioxide that occurs through the semi-permeable shell which is critical to the embryo’s survival. Overcrowding of eggs in the incubator can restrict this process. There should be an inch of “free space” surrounding each egg to allow air exchange.
Make sure the air vent hole(s) and fan on your incubator are free of any obstructions and not too close the wall, preventing proper air circulation. Commercial incubators, such as the GQF models will have multiple vent holes and plugs that can be either opened fully or closed to tweak humidity and temperature levels. Leave as many of these open as possible and adjust your room temperature and humidity to make small corrections. The addition of a small external fan positioned outside the incubator that blows air across the vent holes will also encourage good air circulation inside the incubator.
Routinely rotating the emu hatching eggs also assists in the process of releasing carbon dioxide from the incubator. Opening and closing the incubator door during egg rotation releases the CO2 from the incubator and allows more oxygen to circulate.

Trending Articles


7. Incubator Sanitation
Clean the incubator before and after each hatch with rubbing alcohol to ensure the hatching environment is free of bacteria, mold and other pathogens that are not visible to the human eye but easily permeate the eggshell. It’s important to let the cleaning solution off-gas and fumes dissipate before introducing eggs to the incubator.
8. Hatching Egg Sanitation
Eggs that are dirty when set for incubation introduce bacteria and mold to the process that can enter the egg and affect development. While you should never wash eggs before incubation, gently wiping any mud or debris off the egg with a dry cloth can and should be done.
Of course, the ideal solution is to have clean eggs to start. Keep your emu breeding pairs in a clean and dry area that doesn’t get muddy. Collecting eggs immediately after they are laid will minimize the egg’s exposure to bacteria and environmental pathogens.
9. Mispositioned Embryo
The embryo may position itself incorrectly inside the egg, making it difficult or impossible to develop correctly. While this is out of your control, allowing shipped eggs to rest for a minimum of 12 hours before incubation will aid the process.
10. Failure to Pip or Hatch
Even when an embryo develops fully, some chicks may struggle to break through the shell (pip) due to weakness, improper positioning, or structural issues with the shell itself. For instance, fluctuations in humidity and temperature can negatively impact leg development, making it difficult for the chick to push out of the egg. In some cases, the eggshell may be unusually thick, preventing the chick from hatching. While it can be tempting to intervene, it’s generally best not to. Often, the inability to hatch is due to underlying issues that the chick may not be able to overcome, even with assistance.
Trending Products
Copyright©2024 All rights reserved. We love to have you share our article as long as you include a direct link to this page. This article or any portion thereof , including all images, may not be reproduced or used in any manner whatsoever without the express written permission of Gypsy Shoals Farm.